How To Set Up a Direct Mailer in Canva
Setting up a direct mail campaign, aka using the Mail Merge feature, in Canva is easier than you might think! I'll walk you through how to set up the variable fields like the person's name and address. We'll use some automation with Canva Bulk Create to make it quick and painless. If you're putting together a donor campaign, sending mail to more than 10 people, or just want to understand how to use the feature - this is for you.
You should know that as of Dec. 2025, this feature is only available for Canva Pro, Canva for Teams, Canva for Education, and Canva for Nonprofits users on desktop only.
Design your letter
First things first, you'll need to design your letter. It's important that the text, fonts, and colors reflect your brand's identity. Include images to highlight the impact that your organization makes. Testimonials are great too! It's worth it to spend some time making your ask letter look and sound great.
In Canva, keep each part of your letter in a different text box, like this example. The most important part is to separate the addressee name from the introduction word. In this example, we used "Dear" and the name "Mr. and Mrs. Smith". Make this box extra long to ensure any name will fit, no matter how long it is. We'll make this text box a variable field in the next step.

Don't forget to include the necessary details in your letter like:
- Your Mailing Address
- Phone Number
- EIN
- Donation link
- Website address
- Social Media handles
Variable Fields
Next, the technical details! You'll need to grab your mailing list or create one as a spreadsheet if you don't already have one. You can use any program for this, Google Sheets, Excel, or Numbers will all work.
Make sure each bit of information is segmented into different columns, with the appropriate title for each column:
- Name
- Address Line 1 (# and Street or P.O. Box)
- Address Line 2 (City, State, ZIP)
My favorite hack for this is actually to ask ChatGPT to dedupe your list *and* create a CSV with standardized formatting. Here's how:
- Gather your addresses in the same place. It could be screenshots, a .csv, .txt, .pdf, .jpg, .xlsx or .docx - whatever you have will probably work.
- Go to Ai tool, i.e. Minstrel, Notion, ChatGPT, etc.
- Enter prompt:
I need you to create a CSV file from all of the assets I'm about to share with you. I may drop them in one at a time, so wait until I tell you I'm ready. I want you to look for duplicates and move all duplicates to the bottom of the sheet.
I also want you to look for common address endings to unify and shorten. Here's the only list I want you to use:
Street; street, st-> St
Apartment; apt -> APT
Avenue; ave; av -> Ave
Road; road; rd -> Rd
Suite; suite; ste -> STE
Next, I want you to capitalize all state initialisms, i.e. Ok -> OK; ny -> NY
Then, I want you to move all addresses missing a zip code (the 5-9 digit code that follows every state initialism) to the bottom of the sheet.
Use three columns: Name, Address Line 1, Address Line 2. If information is missing, please skip it.
Additionally, do not change any information other than to make the modifications I've outlined above.
- Drop all your things in
- Download the CSV it gives you
OR copy the table it creates and paste it into a new Google Sheet. You can then download the Google Sheet as a CSV.
It needs to look like this:

Now, to use Canva's Bulk Create feature...
Okay, CSV in hand, we're ready to go back to Canva.
- From the Apps menu in Canva, choose Bulk Create. Then, upload the CSV of your mailing list.
- In your design, right-click the name field to open the sub-menu. Choose Connect data, and then choose Name.
- On the left, in the Bulk Create Menu, press continue and generate all of the designs. This will automatically create a new page for each line/row in the CSV.

Easy right?! Now you're halfway there.
Envelopes
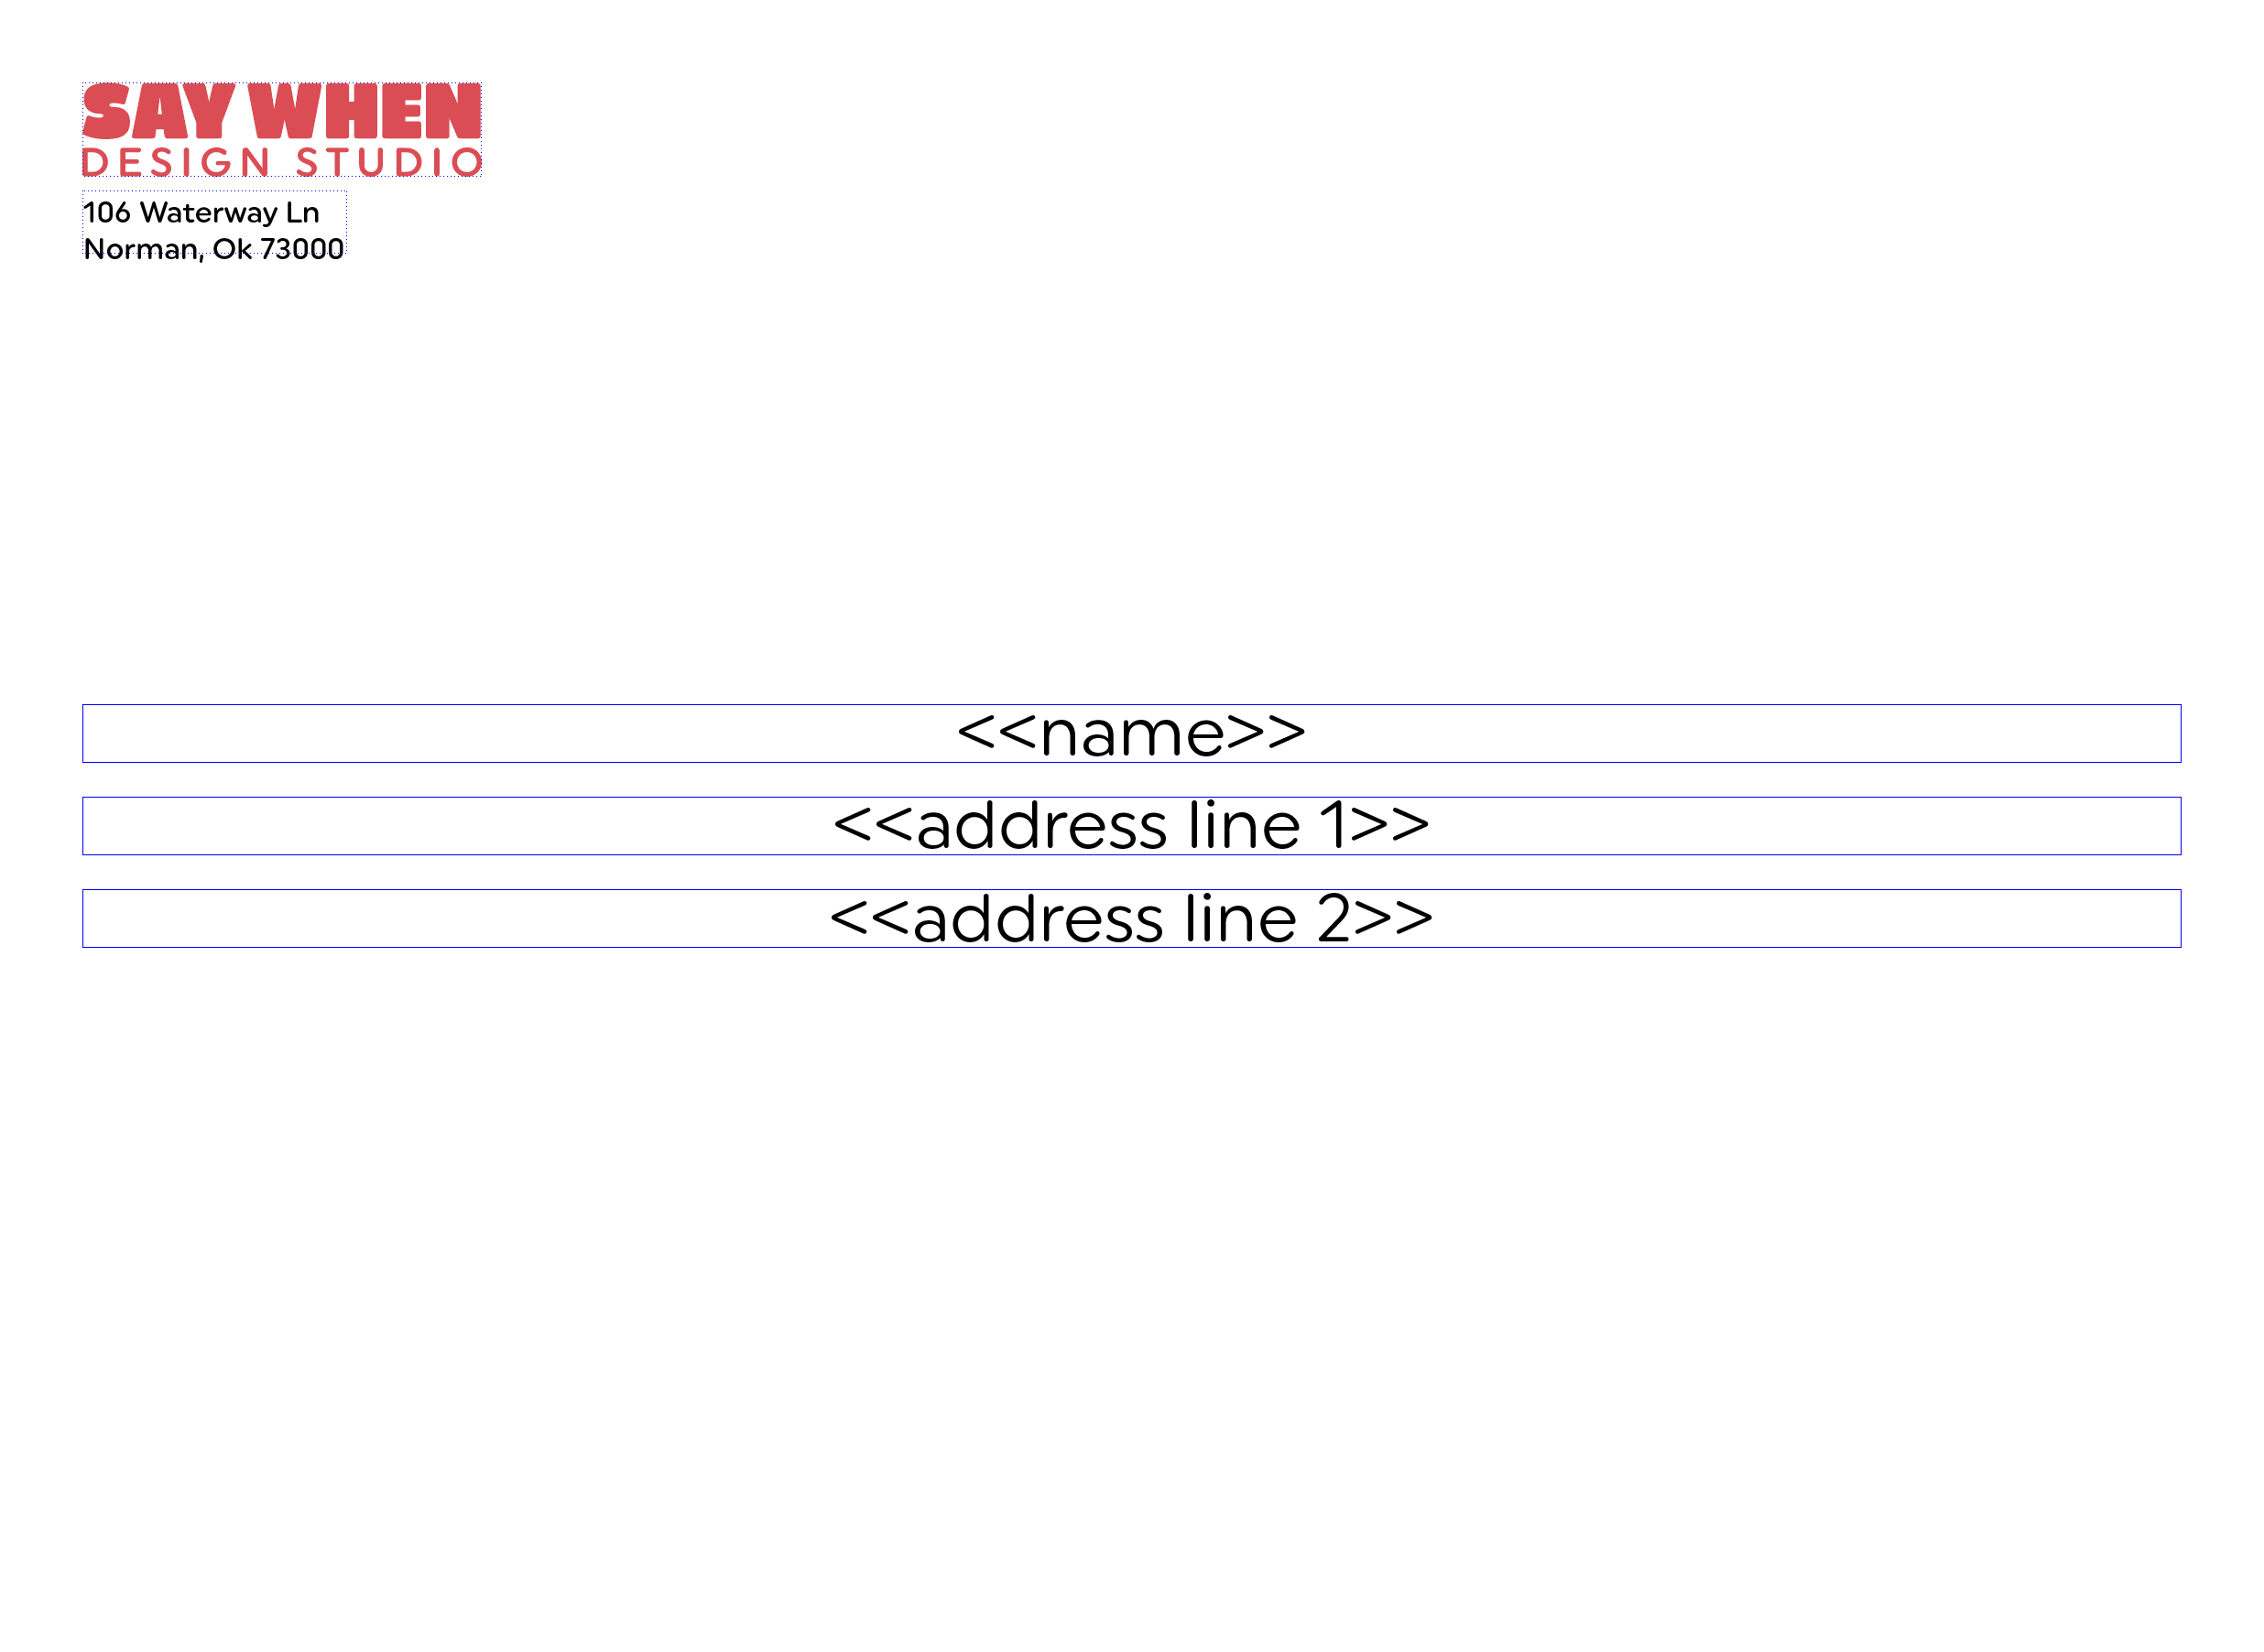
Need to address all the envelopes? Create a new file for the envelopes, using this same technique.
Make sure all three lines of the addressee are separate text boxes. And again, you'll want to make sure they go from edge to edge to account for the longest names/addresses.
Tip - Look through your list and use the longest name as placeholder text to design your envelope and set font styles/size. Then, once you're happy, link up the fields using Bulk Create and let Canva automatically generate all of the envelopes in seconds.
Link each one up with Bulk Create and voila! You're ready to go to print!
Mailing
With your personalized letters and envelopes, you're ready to mail! You can use the USPS or a local print shop.
You can register your Non-Profit with the US Postal Service to receive a NPO Indicia and get a huge discount on mailing cost.
An indicia is the printed label substituted for a stamp. You can apply for one on the USPS website, linked here. With an indicia, you send mail for free* and pay a discounted annual fee instead.
*You do have to send at least 200 identical pieces or 50 pounds. The contents also have to be the same, excluding the name and the address.
Track Your Campaign
Last, you might consider including a tracking code. You can do this by using a unique landing page URL or a QR code. That way you'll be able to see how many people scanned the code or visited that landing page. One nonprofit I've met uses the exact same "dynamic" QR code, so that they can redirect or change the link at anytime.


